(polkadotcanar.blogspot.com) Yes, the "y" is missing from polka dot canary!

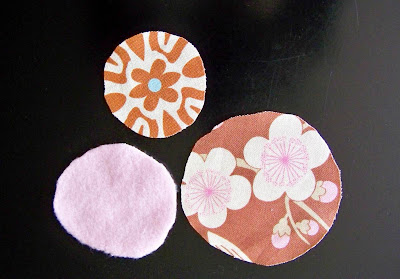
First, cut out three pieces of material. (Be creative and use any material you love!) I like to make one of them fleece or felt, to give it depth and texture. The largest circle can be any size you'd like, but I usually make it 2 5/8 inches in diameter. The middle layer is 2 inches and the little circle about 1 1/2 inches wide. There is no need to make exact, perfect circles, because they actually look better "not so perfect". The frayed edges also look better and better after time.

Next, layer them one on top of another.

Use a sparkly large brad to secure the layers together. Trick: I like to puncture the material first with a thumb tack and then put the brad through the material.

Lastly, I like to sew the hair accessory on with thread and needle, through the hole in the metal hair clip, to secure it on. You can find metal hair clips at any beauty supply store. (You can also use a glue gun and ribbon to attach the clip to the hair accessory)
HERE'S ANOTHER HAIR ACCESSORY METHOD

First, for the bottom layer, cut out a circle from any material with a diameter of 5 1/2 inches. Fold the edge over about 1/4 of an inch and sew in and out, not overlapping any of the tread.

When you come to the end, don't make a knot; just pull the thread to gather it to the center of the circle, making a flower shape. After you have the flower shape, make a knot.


Lastly, layer a circle that is 2 inches and one that is 1 1/2 inches, leaving the frayed edges. Or...... as seen in the picture above, cut a cloth flower down to 3 inches in diameter and place it behind the one you just made. Make the smallest circle about 1 3/4 inches. Secure with a sparkly brad and attach the beautiful hair accessory to a metal hair clip by sewing it on with thread and a needle, or by attaching it with a glue gun and ribbon. Enjoy your fun & chic hair accessory. Remember to be creative and use any material you love!
To follow this blog, simply click on FOLLOW with Google Friend Connect, at the top of this blog! Thanks!

